Abstract
3D printing Pythagoras’ cup; 3D scanning my plushie.
3D printing
This week the assignment was to 3D print an object that cannot be made subtractively. Among this class of objects are those with internal cavities and with bending internal channels/pipes. This reminded me of a little toy I stumbled upon when I was a kid: the Pythagorean cup, also known as the greedy goblet. It mostly looks like a normal cup/glass, except for a protrusion in the middle of the cup. Furthermore, at the bottom of the cup, one may notice a little orifice.
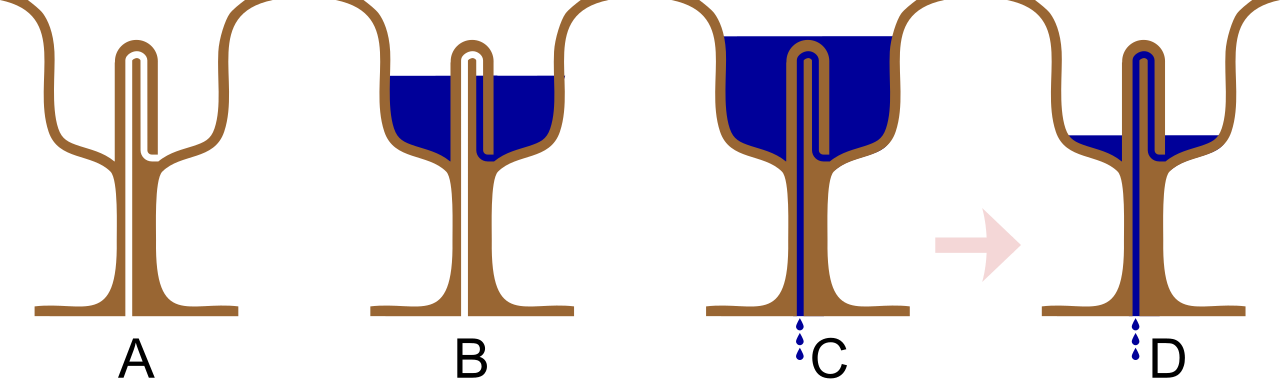
The protrusion in the cup contains an upside-down U-tube that acts as a syphon: when the water level in the cup exceeds the top of the U-turn, the syphon starts acting and the entire content of the cup is drained. A demonstration of the phenomenon (with mercury, don’t try this at home!) in a clear glass pythagorean cup is shown below. A schematic of the phenomenon is also shown in figure 1 (source: Wikipedia).
The legend says that this cup was used by Greek/Roman soldiers when sharing wine, to ensure that none of them gets more than their fair share of one cup of wine. Those that tried to overfill the cup in order to get a little more wine had to face the embarrassment of spilling the whole cup on the floor (and not getting a refill). Ceramic models of such cups dating back from Roman times have been found by archeologists. Interestingly enough, the same mechanism is used to flush toilets in North America, as well as inside fabric softener dispensers in washing machines.
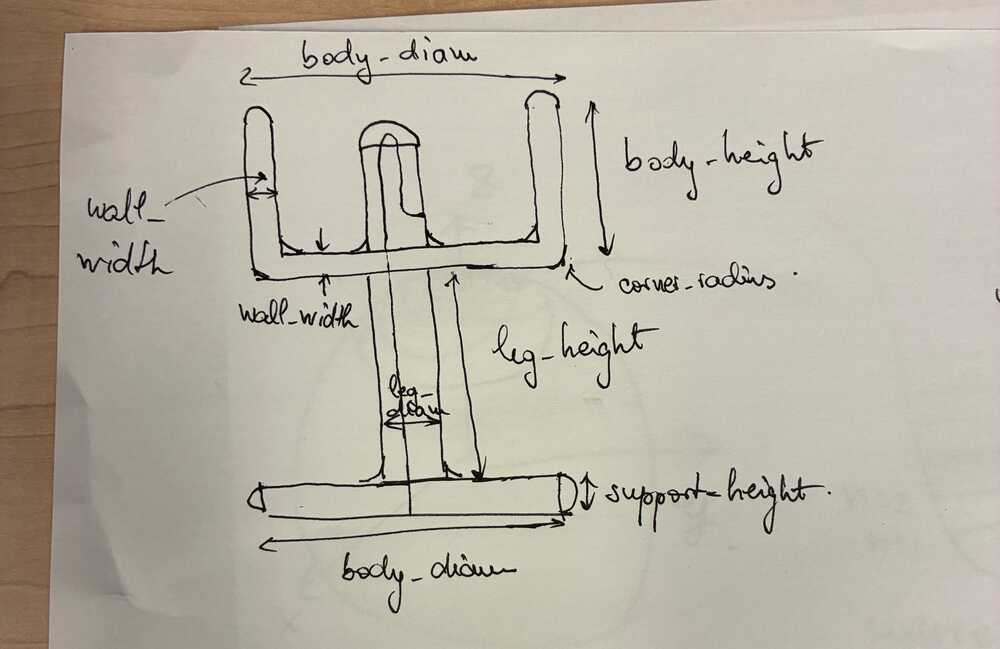
In order to simplify the design, I chose a more geometric approach with less curves. To begin with, I sketched the base, leg, body and syphon protrusion as cylinders (with flat faces), only then adding corner and edge rounding to be more 3D-printer friendly. Afterwards, I sketched the path of of the syphon tube in a cross-section through the middle of the cup, and used the revolve tool to cut a circular channel along that path. Below are pictures of two versions of this design, viewed through a cross-section through the syphon channel.
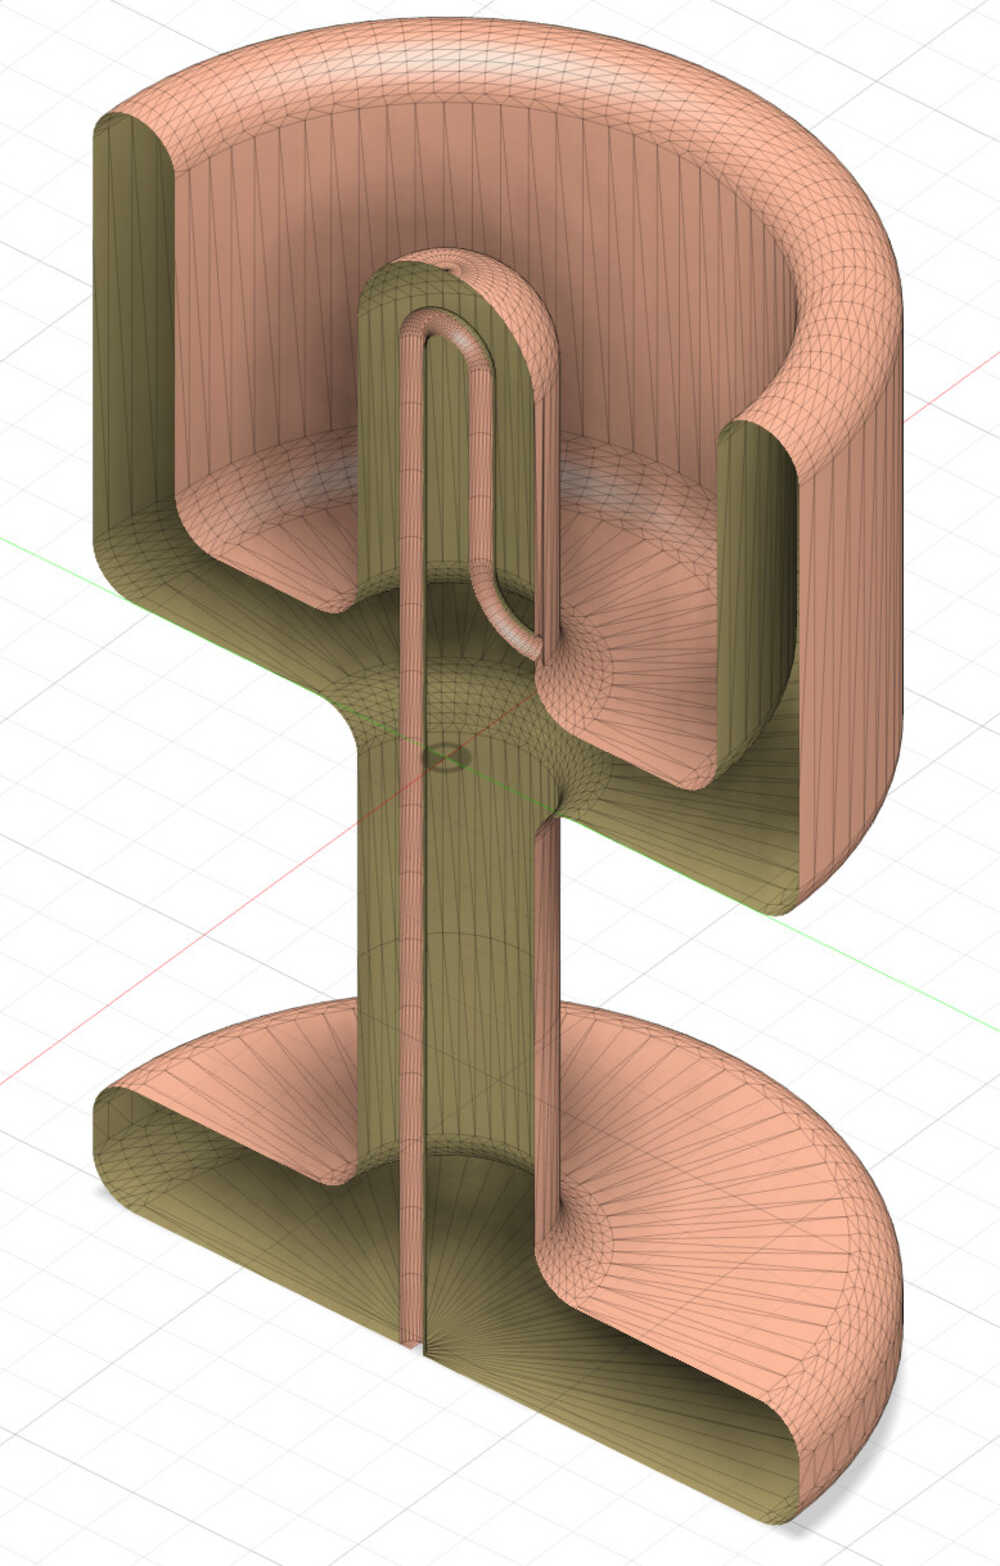
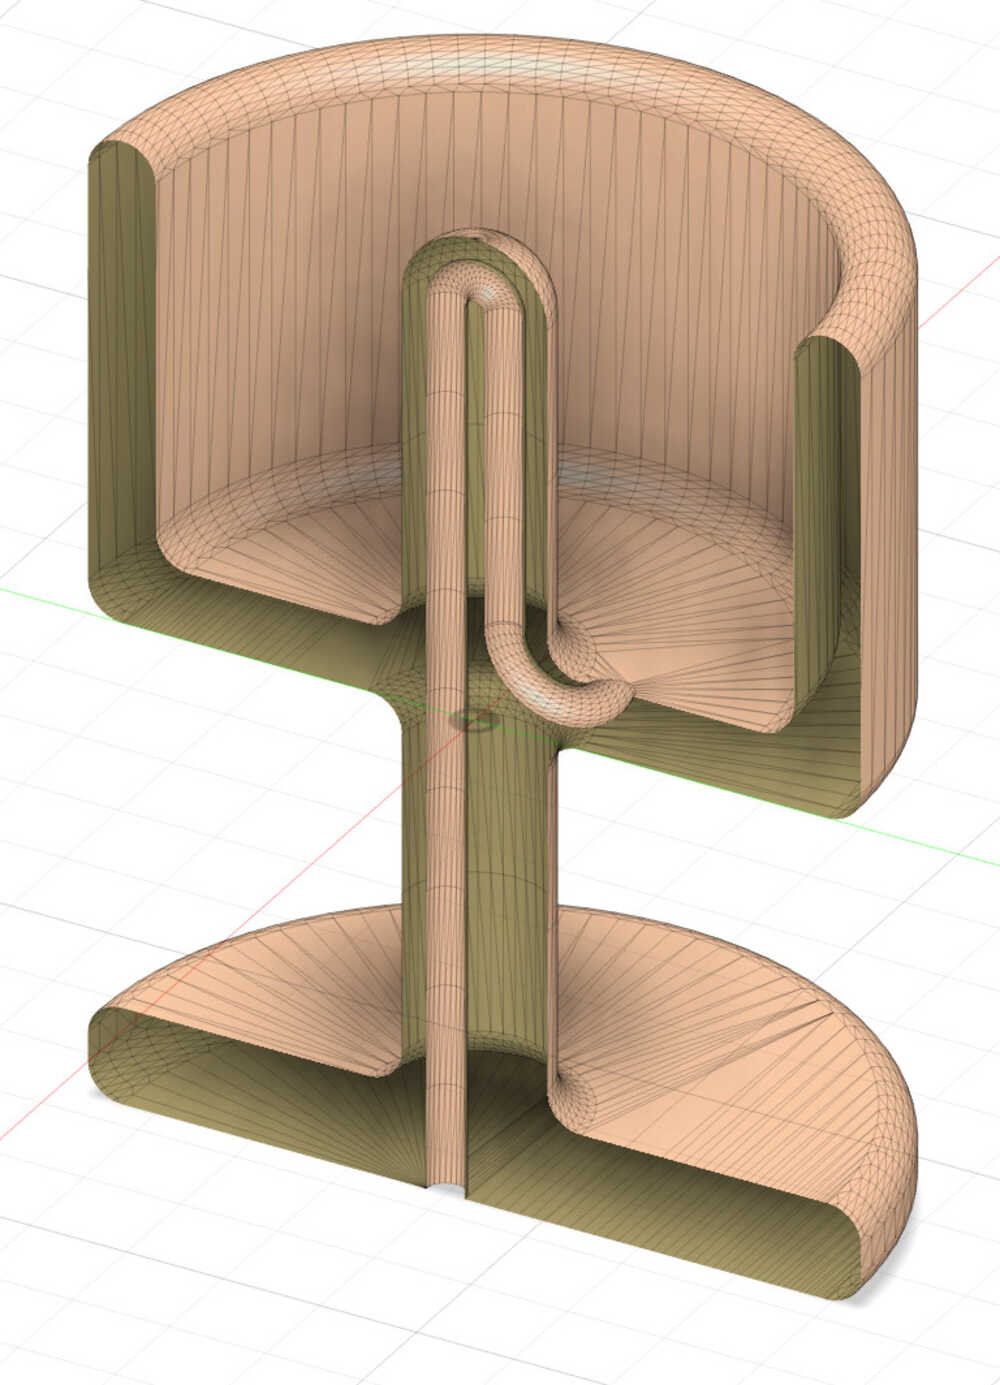
While the first version of the cup worked fine, there were two issues with it: first, the syphon was too narrow (at 2 mm) and surface tension effects started to become noticeable. The water flowed very slowly, dripping drop by drop, and sometimes it wouldn’t flow at all unless the channel is previously primed with water flowing in reverse. Second, I accidentally left the channel orifice higher than the cup’s floor, which led to water not draining completely from the cup. In the second design, I doubled the channel diameter to 4 mm, moved the syphon orifice to the very bottom of the cup, and modified some of the geometric sizes to obtain a more real-size cup.
The files used for printing are available here and here in 3MF format. Below are videos of the cup in a stationary state (holding liquid), as well as the overflow state (draining liquid). One note concerning the slicing process is that the automatic support generation created supports inside the drain as well, which would be very hard to break off and would likely ruin the cup. Instead, I resorted to manually drawing supports on the outside brim of the cup and constraining them to only be based on the print bed.
After printing the second version of the cup, when breaking off the tree supports, I was a bit too aggressive and accidentally broke off the leg of the cup (see below).
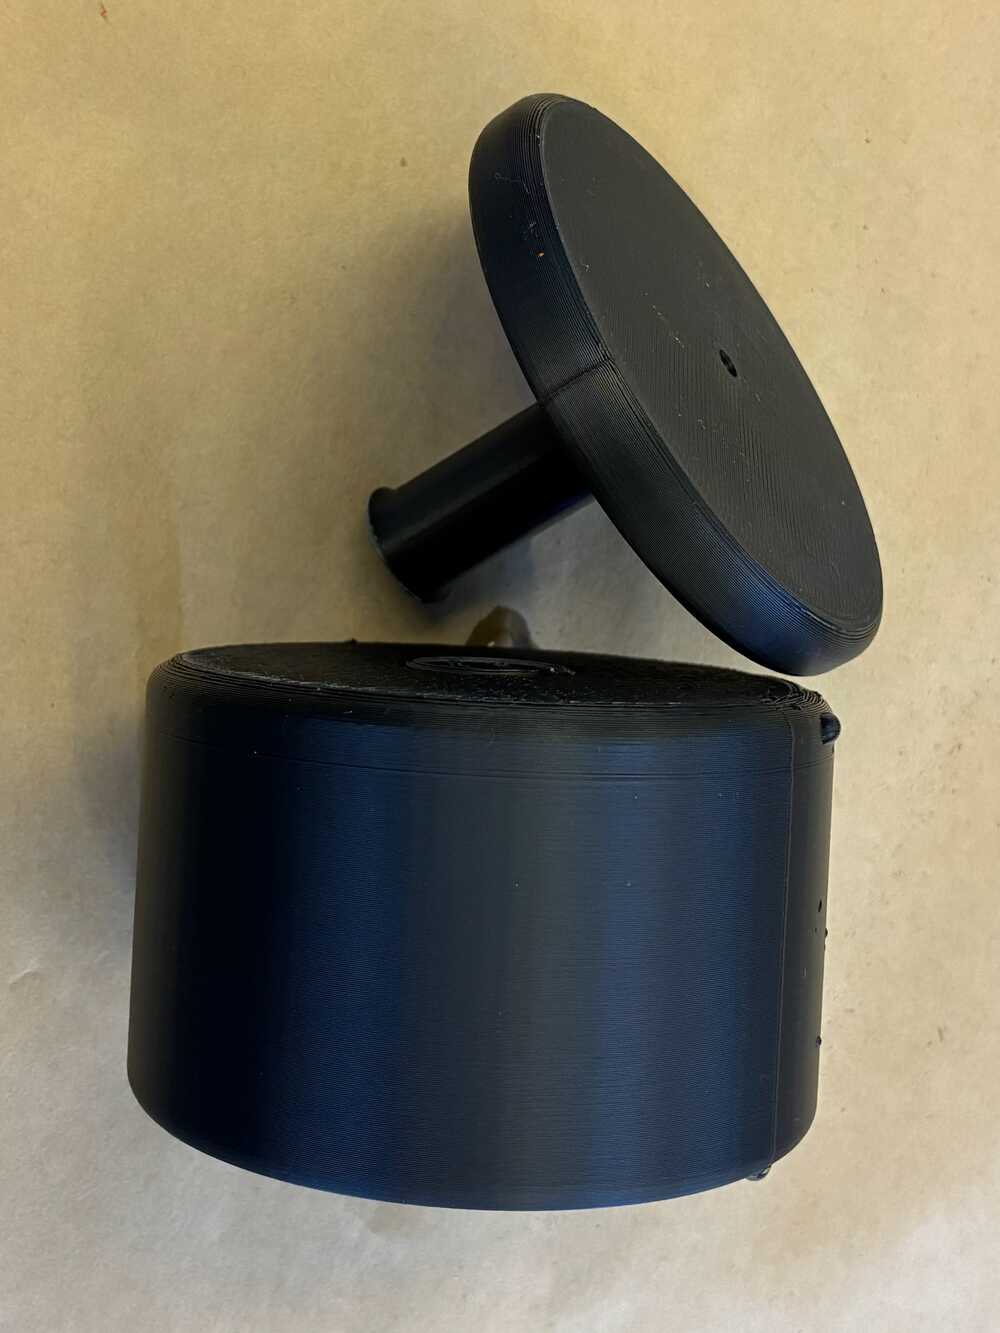
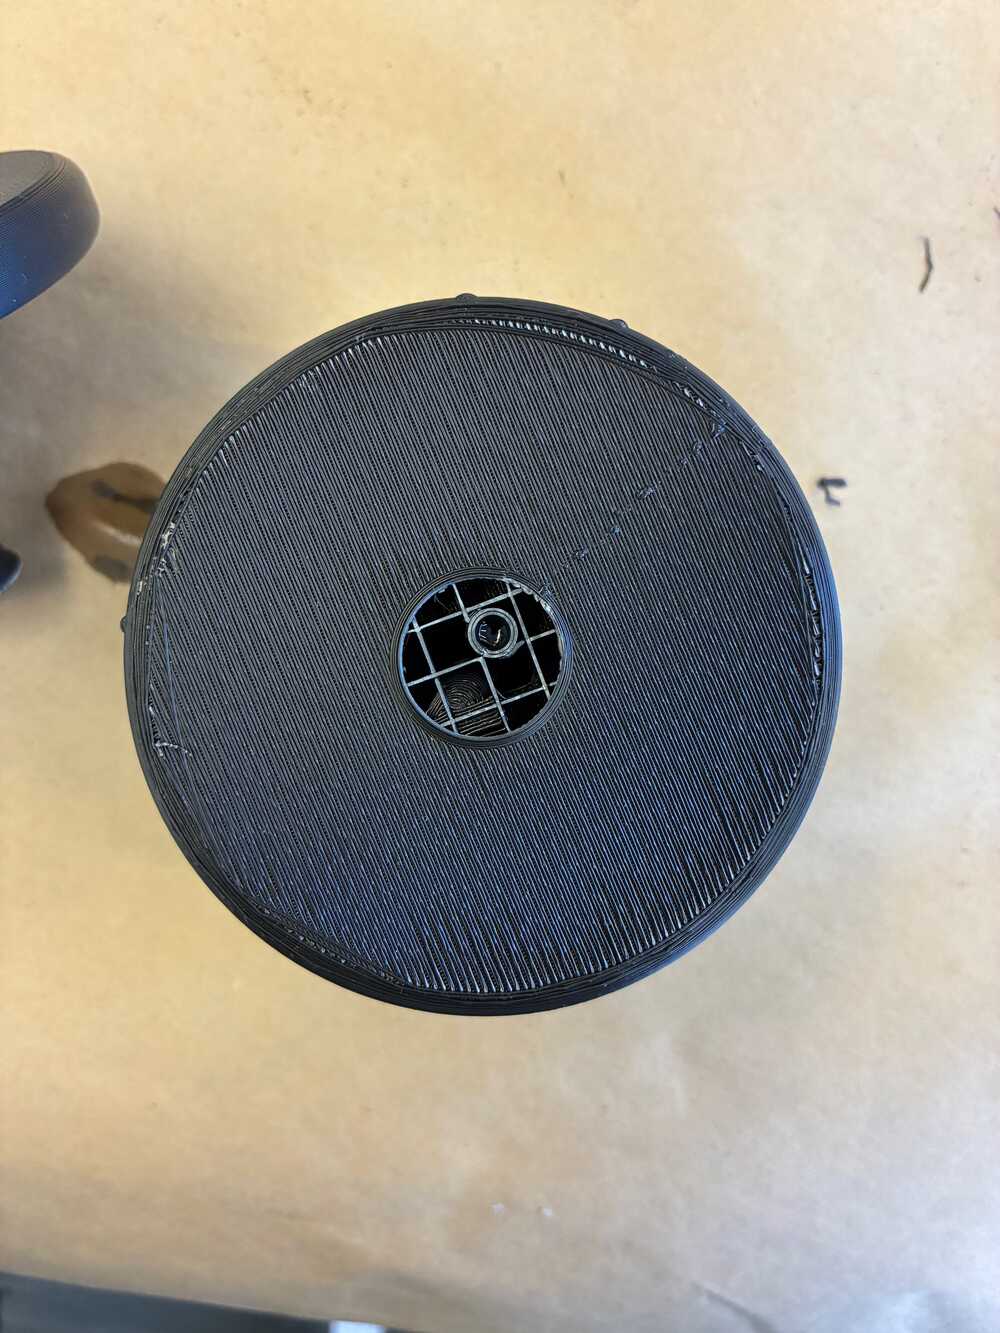
Fortunately, only the second part of the drain was broken and the functionality of the cup is intact. As can be seen in the videos below, the flow is much better than in the previous version! As a future side project, I will be investigating ways to reinforce the leg-body bond to prevent this sort of breakage from happening, but will resume to this version for this week.
3D scanning
Below you can see the scan of one of my plushies captured using Scanniverse. I used the Mesh mode, and selected a Small object, then set a depth of 3 meters. The plushie was placed on a table that I could walk around, and capture from above and below. Due to the 3 meter depth, much of my room was captured in the model, albeit with much lower precision than the plushie, so I had to crop a cylinder out of the resulting file. You can see that, on the lower back, a portion is deformed and at very low resolution. This is likely due to the lighting that was coming from the front, as well as an awkward space constraint that limited the amount of images I could take from that angle. Otherwise, I am happily surprised at the fidelity of the colors and textures!